On this page
To get started with app development for mobile, write down the one problem your app solves, scope a minimum viable product, choose a platform approach (cross-platform fits most first apps), design the core flows, build, test on real devices, and submit to the App Store and Google Play. A focused first version typically takes 10 to 16 weeks with a professional team. It takes much longer if you are learning to code as you go.
Most guides explain what a mobile app is and then stop. You are left with a pile of choices: iOS or Android, native or cross-platform, build it yourself or hire a team. You get no sense of the order to tackle them in, or what any of it costs. Teams that guess tend to build too much, pick the wrong stack, or find out about store rules a week before launch.
This guide walks through the whole process in seven steps, with the tools for iOS and Android, templates you can copy, timelines and budgets. It draws on how we at Arrowbin, a software studio that ships iOS and Android apps from a single codebase, scope and deliver mobile projects. Whether you plan to build the app yourself or brief an agency, you will know what to do next.
What mobile app development involves before you start
Mobile app development is the process of designing, building, testing and publishing software that runs on smartphones and tablets, most often on iOS and Android. It is less about typing code than about making a sequence of decisions in the right order. This guide follows that order.
The process in seven steps
Every credible mobile app development process follows the same arc, even when teams label the phases differently. Microsoft's mobile lifecycle guidance, for example, names inception, design, development, stabilization and deployment. This guide splits that arc into seven steps so each one ends with an output you can check off.
| Step | Classic phase | What you have at the end |
|---|---|---|
| 1. Define and scope | Inception | One-page brief and MVP feature list |
| 2. Choose platform and approach | Inception | Decision on iOS, Android and tech stack |
| 3. Design | Design | Clickable prototype tested with users |
| 4. Build | Development | Working app running on real devices |
| 5. Test | Stabilization | Stable beta build |
| 6. Publish | Deployment | Approved listings in both stores |
| 7. Launch and maintain | Deployment and beyond | Metrics, updates and a support plan |
Expect the steps to overlap and loop. Testing in step 5 will send you back to step 4, and user feedback after launch will send you back to step 1.
Three ways to get the app built
Choose your route before you start, because it changes the budget, the tools and the timeline of every later step. There are three realistic options:
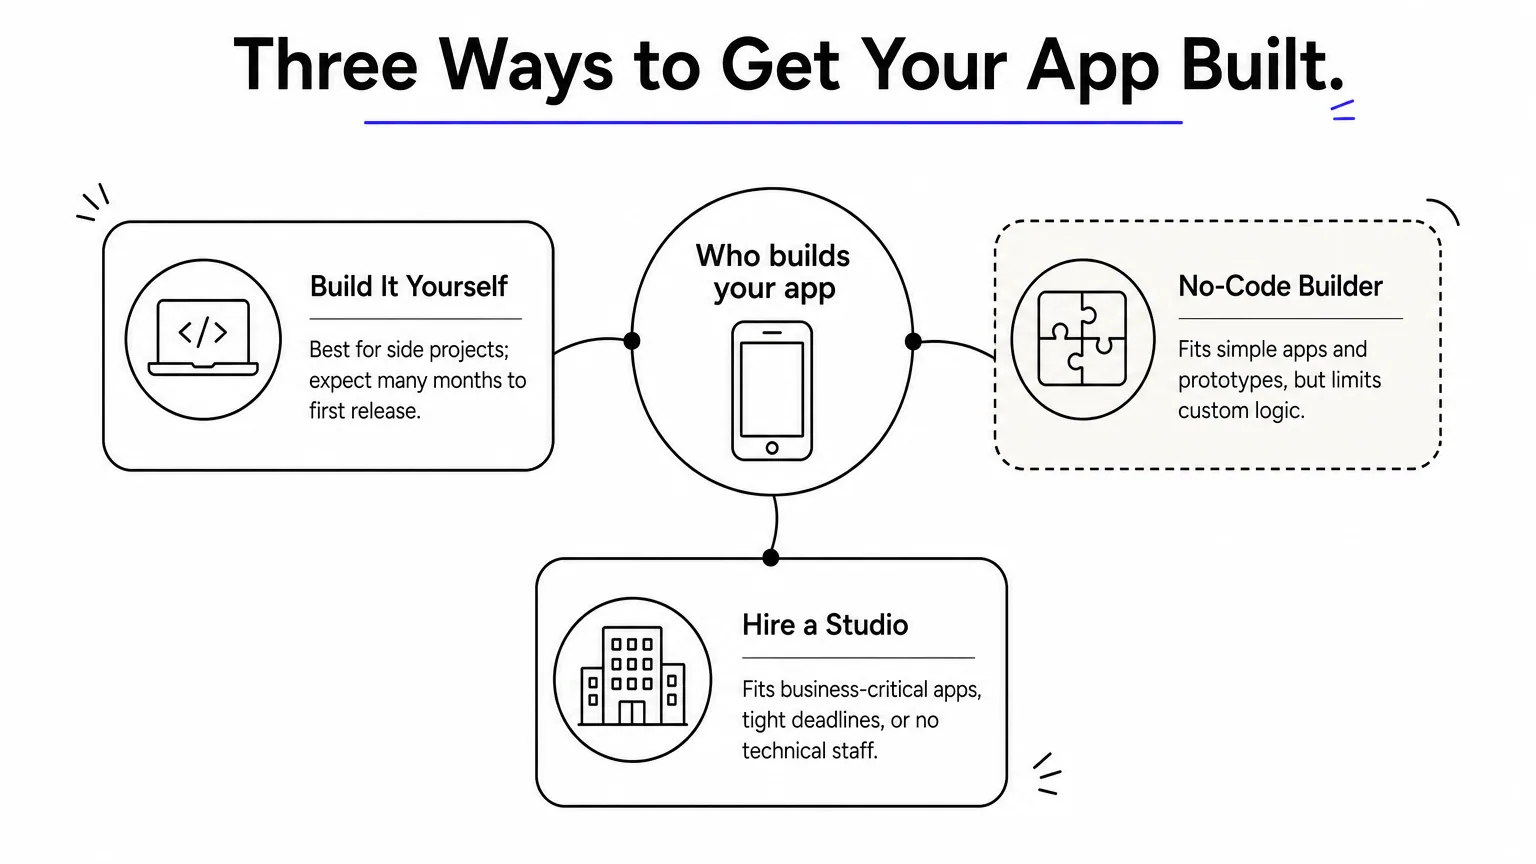
- Build it yourself. You learn JavaScript or TypeScript for React Native, Dart for Flutter, Kotlin for Android or Swift for iOS. This works for side projects and for people who want to become developers. Plan on many months before your first store release.
- Use a no-code or low-code builder. Visual tools such as FlutterFlow suit simple apps, internal tools and prototypes. You trade away custom logic, fine performance control and sometimes the ability to export clean code.
- Hire a studio or a team. This fits when the app is central to your business, you have a deadline, or you have no technical staff. Insist on owning the source code and on having the developer accounts in your own name.
Many founders mix the routes. They validate an idea with a no-code prototype, then have a team rebuild it properly once real users confirm demand.
Decide who builds the app before you decide what it looks like, because that choice shapes your budget, your stack and your launch date.
What to have ready
Gather these before step 1 so you do not stall halfway through:
- A problem statement and a named target user
- A budget range and a launch window
- A Mac, if you plan to build or test native iOS apps (Xcode runs only on macOS)
- At least one recent iPhone and one Android phone for testing
- Money for developer accounts: $99 per year for Apple, a one-time $25 for Google Play
- One person who can make product decisions quickly
Step 1. Define the problem and scope your MVP
Write one sentence that names the user, the problem and the single action your app makes easier. Then cut the feature list until a first version could ship in about three months. Apps fail more often from bloated scope than from bad code.
Write a one-page app brief
A one-page brief forces the decisions that otherwise surface as expensive surprises in week eight. It is also the document any developer or agency will ask for first. Copy this template and fill it in honestly, leaving blanks where you do not know yet.
App name (working):
Who it is for:
The problem in one sentence:
How people solve it today:
The one action the app must make easy:
Must-have features (maximum 5):
  1.
  2.
  3.
Later, not in version 1:
Platforms at launch: iOS / Android / both
Integrations (payments, maps, login, push, third-party APIs):
Success metric after 90 days:
Budget range and target launch date:
Cut the feature list to an MVP
Sort every idea into "version 1" or "later". The rule is simple: if users can complete the core action without a feature, it waits. A minimum viable product is the smallest app that lets real people do the one thing it promises.
Take a class-booking app for a fitness studio. The core action is booking a spot. Everything else is negotiable.
| Feature | Version 1? | Reason |
|---|---|---|
| Sign in with email, Apple or Google | Yes | Bookings must belong to a person |
| Class schedule | Yes | Users cannot book what they cannot see |
| Booking and payment | Yes | This is the core action and the revenue |
| Reminder notifications | Yes | Cuts no-shows cheaply |
| Loyalty points | Later | Needs usage data to design well |
| In-app chat | Later | Email handles questions for now |
| Referral codes | Later | Needs a user base first |
Your first release should do one thing well enough that people would be upset if it disappeared.
Validate before you commit budget
Show paper sketches to five to ten people in your target group and watch where they hesitate. Read the one-star and two-star reviews of competing apps in the stores, because they list exactly what users hate. A simple landing page with a waitlist form tells you whether strangers care.
List your integrations at this stage. Payments, maps, social login, push notifications and third-party APIs each add design, build and testing work. Knowing them early makes any estimate you receive far more accurate.
Step 2. Choose your platform and build approach
For most first apps, build for iOS and Android together using a cross-platform framework such as React Native or Flutter. Go native only when your app depends on platform-specific hardware or heavy graphics. Two decisions sit here: which platforms, and which approach.
iOS, Android or both
Pick the platform your users already hold. Worldwide, around 70% of smartphones run Android, but the split in your market and among your own audience can look very different. Check your website analytics, your customer surveys or your competitors' store rankings before you assume anything. Here is how the two platforms differ for builders:
| iOS | Android | |
|---|---|---|
| Main languages | Swift | Kotlin (Java also supported) |
| UI toolkit | SwiftUI, UIKit | Jetpack Compose |
| Official IDE | Xcode (macOS only) | Android Studio (Windows, macOS, Linux) |
| Store account | $99 per year | $25 one-time |
| Device range | Fewer devices, simpler to optimize | Many makers, screen sizes and OS versions |
| Distribution | App Store, with limited exceptions by region | Google Play, plus other stores and direct installs |
Android mobile app development gives you a cheaper entry and looser distribution rules. iOS gives you a narrower device range to test. If you must start with one, start where your audience is, and plan the other platform for the next release.
Native, cross-platform or web app
Three approaches exist, and each has a clear best use.
| Approach | Built with | Best for | Main trade-off |
|---|---|---|---|
| Native iOS and Android | Swift and Kotlin, two codebases | Heavy graphics, advanced hardware, platform-first features | Two codebases mean higher cost and a longer timeline |
| Cross-platform | React Native (JavaScript or TypeScript) or Flutter (Dart), one codebase | Booking, marketplace, content, fintech and most business apps | A rare new platform feature may need native code |
| Progressive web app | HTML, CSS and JavaScript in the browser | Simple tools and quick validation | Limited device access and weaker store presence |
Cross-platform tools now deliver native-quality apps for the large majority of business products, and they typically save 30 to 40% compared with building two native apps. If your team already writes JavaScript or TypeScript, React Native is the natural fit. Flutter suits products with a heavily customized, animation-rich interface.
Choose the approach that matches your features and your team's skills, not the one that wins arguments online.
When native is still the right call
Choose native when the app leans on augmented reality, advanced camera processing, continuous background Bluetooth or intensive on-device computation. Pick it too when you need a brand-new platform feature on the day Apple or Google ships it. Even then, you can often write a small native module inside a cross-platform app and keep one codebase for the rest.
Step 3. Design the interface and core flows
Design the main user flow first, sketch it as wireframes, turn it into a clickable prototype and test it with about five people before any code is written. Fixing a confusing screen in a prototype takes an hour. Fixing it after development takes days.
Map user flows and wireframes
Start with the flow for your core action, such as "open app, pick a class, book, pay, see confirmation". Draw it as boxes and arrows, then give each box a low-fidelity wireframe. Figma is the common tool for both.
Keep the first flow under six screens. Every extra tap loses users, and mobile users expect to finish tasks in a few taps. Design the empty, loading, error and offline state of each screen as well. Those states are where amateur apps feel broken.
Design for touch and small screens
Mobile devices have less screen, less memory and less processing power than a desktop, so a mobile interface should be simpler and lighter than a desktop one. Follow the platform guidance: Apple's Human Interface Guidelines for iOS and Material Design for Android. These rules prevent most usability problems:
- Make tap targets at least 44 by 44 points on iOS and 48 by 48 dp on Android.
- Put primary actions within thumb reach, near the bottom of the screen.
- Reduce typing with pickers, autofill, camera input and saved choices.
- Support dark mode, large text sizes and screen readers.
- Check color contrast against WCAG 2.2 AA, the standard we design to at Arrowbin.
Prototype and test with five people
Link your screens in Figma into a clickable prototype and ask five people from your target group to complete the core task while you stay silent. Note where they pause, tap the wrong thing or ask a question. Five sessions surface most major usability issues.
Plan two to three weeks for a design phase on a focused MVP. It should end with final screens for every state, a small design system of colors, type and components, and files your developers can build from.
A prototype that five strangers can use without help is worth more than a polished design nobody has tested.
Step 4. Build the app in thin slices
Set up your tools, build one complete slice of the core flow end to end, and keep adding slices until the MVP is done. Do not build all the screens first and connect them later. A thin slice proves the whole stack works before you invest in the rest.
Set up your tools
Your tools depend on the route you picked in step 2.
| Route | Language | Editor | Running on a device |
|---|---|---|---|
| React Native with Expo | TypeScript | VS Code | Expo Go or a development build |
| Flutter | Dart | Android Studio or VS Code | flutter run |
| Native iOS | Swift | Xcode | iPhone or Simulator |
| Native Android | Kotlin | Android Studio | Emulator or physical phone |
These commands create a working starter project for the two common cross-platform routes:
# React Native with Expo
npx create-expo-app@latest my-app
cd my-app
npx expo start

# Flutter
flutter create my_app
cd my_app
flutter run
Set up version control and automated builds on day one. Every change should run checks automatically before it reaches your testers.
Build the core flow end to end
For the booking example, the first slice is: a user signs in, sees a hardcoded class, taps "book", and a record appears in the database. Only then do you add real schedule data, payments and notifications. This order exposes integration problems in week two, not week nine.
Work in short sprints with a working demo at the end of each week. At Arrowbin we run Friday demos, so clients see running software and never read a status report. Whatever your setup, a weekly demo is the best protection against building the wrong thing.
Build one thin slice that works from screen to database before you add anything else.
Pick a backend that matches the app
Most apps need an API, a database, authentication, file storage and push notifications. You can write a custom API (for example Node.js with Postgres) or use managed services such as Firebase. Custom suits complex business logic and gives you full control. Managed services get a simple app running faster.
Keep heavy processing off the device. Offload searches, image processing, AI calls and large data work to the cloud, and keep the app focused on the interface. Use HTTPS everywhere, store tokens in the platform's secure storage, and never ship secret API keys inside the app bundle, because anyone can extract them.
Where AI assistants help and where they do not
AI assistants can draft screens, write boilerplate, generate tests and explain error messages, so they speed up a developer noticeably. They cannot reliably design your architecture, secure your data, handle store accounts or debug a crash that only appears on one phone model. Ask the question people often type, "can ChatGPT build me an app?", and the honest answer is that it can produce a prototype you must still review, test and publish yourself.
Treat the assistant as a pair programmer. Read every line it writes and run it on real devices.
Step 5. Test on real devices until it is stable
Test on physical phones, run a beta with real testers, and fix problems in order of severity before you submit. A build that works on your own phone has proven very little. Stabilization is where most of the quality in a mobile app is won.
Test the cases users actually hit
Emulators miss real-world behavior, so borrow phones. Cover at least one older Android device, one small-screen phone and one recent iPhone. Run through this checklist on each:
- Cold start time and smoothness while scrolling
- Weak, slow and lost network, then reconnecting
- Phone call, alarm or notification interrupting a task
- Permissions denied, such as camera or location
- Low battery mode and low storage
- Dark mode, large text and a screen reader
- Rotating the screen and switching between apps
- The oldest OS version you promise to support
Run a beta with real testers
Distribute pre-release builds with TestFlight on iOS and Google Play's testing tracks on Android. Invite 10 to 30 people from your target group and ask for one thing: complete the core task and report anything odd. Add a crash reporter before the beta, such as Firebase Crashlytics, so you see failures that testers never mention.
Check the current Play Console requirements before you plan your schedule. New developer accounts can face testing requirements before they may release to production, and those rules change.
Triage bugs by severity
Sort every issue into one of three buckets. A blocker stops the core action or crashes the app, and it must be fixed before release. A major bug breaks a secondary feature or looks clearly wrong, and it should be fixed. A minor issue is cosmetic and can go on the post-launch list.
Never ship with a known blocker, however tight the deadline. Store reviewers and early users punish crashes harder than missing features, and one bad week of ratings is slow to repair.
Beta testers find the bugs you cannot see, so give them real tasks and a crash reporter, not just an invitation.
Step 6. Publish to the App Store and Google Play
Create both developer accounts early, prepare your store listing, submit the build and respond quickly to reviewer questions. Store review usually takes from a day to a week, but account setup and listing assets can take longer than the review itself.
Create your developer accounts
Apple's Developer Program costs $99 per year, and a Google Play developer account costs a one-time $25 through the Play Console. Organization accounts need business verification, which can add days, and Apple requires a D-U-N-S number for organizations. Start this paperwork during the design phase, not on launch week.
Register the accounts in your own name or your company's name, never in a contractor's. Whoever owns the accounts owns the app listing, the reviews and the ability to publish updates. With our clients, the accounts, source code and app data all belong to the client.
Prepare the store listing
Both stores need a full set of assets, and gathering them is a surprising amount of work. Prepare this list:
- App name and a short subtitle or promotional text
- Full description and keywords
- Icon in the required sizes
- Screenshots for each required device size
- A public privacy policy URL and a support URL
- Apple's privacy details and Google's Data safety form, both matching what the app really collects
- An age or content rating questionnaire
- A demo account with working credentials for reviewers, if the app needs a login
Submit and handle review
Upload the build, complete the forms and submit. Read Apple's App Store Review Guidelines first, since most rejections trace back to a few causes: crashes, incomplete information, missing demo credentials, and privacy declarations that do not match the app's behavior. If your iOS app offers third-party social login, check whether the guidelines require an equivalent privacy-focused sign-in option as well.
If you get rejected, read the note carefully, fix exactly what it names and resubmit with a short explanation. A rejection is routine and usually costs a few days.
Most store rejections come from missing information, not bad apps, so prepare every field and a demo account before you hit submit.
Step 7. Launch, measure and maintain the app
Release in stages, watch a small set of metrics, and budget for ongoing maintenance from the start. Launch is the beginning of the product's life. Operating systems update every year, and an unmaintained app slowly stops working.
Launch in stages
Both stores let you release gradually. Google Play supports staged rollouts by percentage of users, and Apple offers phased release for automatic updates. Start with a small share, watch the crash reports and reviews, then widen. A bad bug reaches 5% of users instead of all of them.
Prepare a simple launch kit: an announcement to your existing customers or list, a link that opens the right store on each platform, and a way for users to contact support from inside the app.
Track the metrics that matter
Skip vanity numbers like total downloads. Track these instead:
- Activation: the share of new users who complete the core action once
- Retention: how many return on day 1, day 7 and day 30
- Crash-free sessions: the share of sessions that end without a crash
- Ratings and review themes: what users repeatedly praise or complain about
Review these weekly for the first two months. They tell you whether to fix, simplify or extend the product.
Plan maintenance
Maintenance keeps the app secure, compatible and fast. It covers OS updates, dependency and security patches, backups, bug fixes, store policy changes and small improvements. Budget for it before launch, because teams that do not are forced into emergency fixes.
Our Maintenance & Support plans show what a typical structure looks like. They run month to month, onboarding takes about a week, and the exact SLA, hours and price are agreed after a free audit.
| Plan | Dev hours per month | Critical response time |
|---|---|---|
| Essential | 5 | 4 hours |
| Growth | 20 | 1 hour |
| Dedicated | 80+ | 15 minutes |
Every plan includes monitoring, security and dependency updates, backups, bug fixes and a monthly health report. Whoever maintains your app, ask for those same basics in writing.
An app is software that has to keep working while two operating systems change underneath it, so maintenance is part of the price.
What a mobile app costs, takes and earns
At Arrowbin, a polished MVP built for iOS and Android from one codebase usually costs between $12,000 and $40,000 and takes 10 to 16 weeks. Your own figure depends on features, integrations and design depth. Other teams price differently, so compare scope line by line, not just totals.
What drives the cost
Cost follows complexity, not screen count alone. These factors move the estimate most:
| Cost driver | Raises the cost when |
|---|---|
| Features and screens | Each added feature needs design, build and testing |
| Custom design | You want bespoke animation and a full design system |
| Integrations | Payments, maps, third-party APIs and identity checks are involved |
| Backend and admin | You need a custom API, a database or an admin panel |
| Real-time features | Chat, live tracking or collaboration are core |
| Offline mode | The app must work without signal and sync later |
| Regulation | Health, finance or children's data adds compliance work |
| Platforms | You build two native apps instead of one cross-platform app |
A worked example shows the platform effect. Suppose two native apps for the same scope were quoted at a combined $40,000. A 30 to 40% saving from one cross-platform codebase brings the cost to about $24,000 to $28,000. That is an illustration of the arithmetic, not a quote.
A realistic timeline
A focused MVP follows these phases. Scoping takes one to two weeks, design two to three weeks, and development with testing six to ten weeks. Those add up to nine to fifteen weeks, and a store review of a day to a week brings a typical MVP to 10 to 16 weeks from kick-off to release.
Ask any team for a fixed estimate once the core feature set is defined. Fixed, itemised estimates protect you from surprise invoices, and they reward the scoping work you did in step 1.
What an app can earn
Revenue depends on your model, not on download counts. The main models are paid downloads, subscriptions, in-app purchases, advertising and indirect revenue, where the app supports sales elsewhere. There is no standard answer to what 100,000 downloads earn, so work it out with your own assumptions.
Here is an illustration. Say 100,000 downloads, 3% of users paying, and a $40 annual subscription. That gives 3,000 payers and $120,000 in gross revenue. The stores keep a commission, commonly 15% to 30%, which leaves roughly $102,000 at 15% or $84,000 at 30%. Change the conversion rate from 3% to 1% and the same downloads bring in about a third as much.
Model revenue from conversion rate and price per user, because downloads alone predict nothing.
Start small, then ship
Mobile app development comes down to seven moves: define one problem, scope a lean MVP, choose a platform approach that fits your audience, design and test the flows, build in thin slices, test on real devices and publish. Then you measure and maintain. Most first apps should be cross-platform, scoped to a handful of features, and released in stages.
If you want a senior team to take it from brief to the app stores, we can help. You can book a free 30-minute call with Arrowbin to get a clear scope, timeline and fixed estimate for your app, with no obligation.